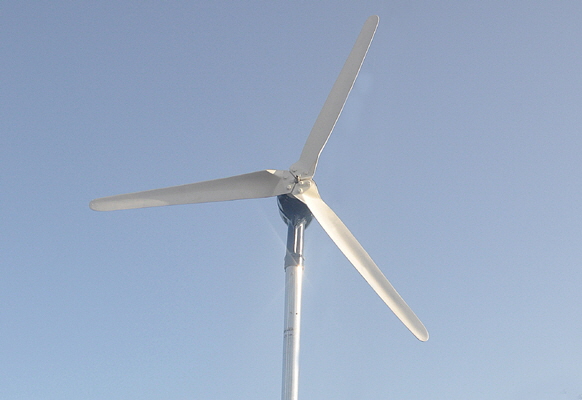
I confess I am often guilty of surrendering to the adage, "If it ain't broke, don't fix it!" Scheduled maintenance is one thing, but shinning up a 57' foot mast just because a hurricane is expected is another. That is where my ubiquitous Kiss wind generator was perched. The name is an acronym for “Keep It Simple Stupid,” that is a good maxim for any boat, but one I do not always adhere to.

This is the electrical connector which allows the Kiss to rotate in any direction.This big heavy wind turbine has been around for 21 years and can still be seen churning out electricity in nearly every marina in the world. It had also worked flawlessly for the ten years I have owned Britannia, and goodness knows how many years before that. It was originally mounted high on the mizzen mast, so when I changed the rig to a schooner I installed it back up the mainmast. The downside is that it was rarely even inspected, that is, until a certain whopping great hurricane named Dorian rolled up the Florida eastern seaboard in October 2019. 100 mph gusts were recorded at Cape Canaveral, that is enough to send any wind generator into orbit, even without the aid of the Falcon X rockets that are now being launched within sight of the marina. Another problem with mounting a wind generator high up a mast is; it can't be restrained in high winds with a rope tether, like those that are mounted on a pole on the stern. The wiring also needs a Mercotac type rotary connector that allows the Kiss to completely rotate 360 degrees in any direction, and prevents the wires becoming twisted.

We spent four days completely stripping Britannia in preparation for the arrival of Dorian, but I forgot about the lonely old Kiss high up on the mast… When I returned to the boat a few days after the hurricane had continued north on its destructive path, I noticed the genny' was not spinning even though there was a 15 knot breeze. Something was up, and it looked like it would probably have to be me—up the mast to investigate. Even though there are steps up both masts I still find it nerve-wracking to scale Britannia's tall mainmast as my wife tails the halyard round a winch and I slowly climb with the bosun's chair strapped to my waist. When I finally got to where the machine was mounted I found the blades could hardly be turned by hand, and it felt like the bearings had seized.

I set up a snatch block pulley on the triatic stay so it sat directly above the generator. Then I tied a rope strop around the Kiss body to keep it level so it could be pulled out of its vertical support post. The oval shape of the Kiss body is not conducive to tying a strop to it at any time, and especially when swinging fifty feet up a mast on a rope. The support post also stands 33" inches away from the mast to allow the blades to clear as they rotate. While I was doing all this I thought, "There has to be a better way than this."

The machine was finally lowered and I lugged it home to investigate in my air-conditioned workshop. 'Lugged' is the operative word, because the thing weighs as much as a car battery and the blades are nearly 5' feet in diameter.

                                                                                                DISMANTLING

I first removed the plastic nose cone. This just screws on the tapered threaded shaft, but as I unscrewed it the cone broke away from its base. Next, the nine bolts holding the three blades to the hub were removed and the hub unscrewed by holding the shaft with a vice grip and unscrewing it.

Removing the front hub after unscrewing the blades.The rear bearing in place, ready for the rotor to be pushed into the stator.Four 5 1/2" inch long screws hold the front casing to the fiberglass body and I was surprised to find they all came out easily, even the last one that is usually the one Mr. Murphy refuses to release. I then cut out the caulking sealing the front casing to the body and after a bit of leverage with a couple of screwdrivers the cover came off, revealing the inside workings. It looked like a fancy alternator to me, that is more or less what it is. The outside copper windings are called  the stator and the rotating bit in the middle is the rotor. The rotor is a very powerful Pulling the rotor out of the stator using a wooden lever to break the strong magnetic hold.cylindrical magnet that when spun by the wind, creates an electrical charge in the windings of the stator.

The view inside the machine.The next question was: how to get the rotor out of the body? It was not held in by anything after the four long screws had been removed, so I held the body securely in my bench vice and levered the whole lot out using pieces of wood as a fulcrum. The stator and rotor came out in one heavy lump, along with the rear bearing. All the weight is in the stator and rotor, so it is best not to let these drop on your toes because they might become irreparably damaged, and you might also need new toes. I was amazed at how light the main fiberglass body then was.
Removing the rear bearing off the rotator's shaft.
The front bearing had seized and the rear one looked like it was about to go the same way. I pulled them both off the shaft using a hub puller I bought from an auto parts shop This shows the three thermostats which shut the generator down in high winds.years ago.

In the rear of the stator are the thermostats, that prevent overheating and allow the blades to free-wheel when going berserk in high winds. I tested them with an ohs-meter and they all read zero (0.00), meaning they were likely still working fine. It was then just a question of cleaning everything and buying new bearings and bearing seats. One of the advantages of the Kiss is that bearings and seals are available more or less anywhere. I ordered mine from Amazon.com for only $5.00 each.

                                REPAIR AND REASSEMBLY

Reinstalling the bearings, using a sash clamp to push the bearings back on the rotor shaftI pressed a new front bearing onto the rotor shaft using a bar clamp and a 3/4" inch inside diameter plastic tube. I used the same clamp and a block of wood to locate the rear bearing until both bottomed against lips on the shaft. The rubber bearing seats are there to centralize the bearings in their housings, and the rear one needed to be fitted before the stator was replaced.

Before finally replacing the stator and rotor I decided to try a better way to re-hoist the heavy machine instead of a clumsy rope strop. I first found the exact horizontal balance point of the assembled machine with the blades attached, that is, (as one might expect), the vertical axis of the swivel pipe. I then drilled a 5/16" inch hole through the top of the body on this axis and pressed an aluminum threaded insert through the hole from the inside. This had a small shoulder that prevents it from being pulled through by the weight of the machine. I sealed around the insert with epoxy then screwed a 1/4"x 20 TPI stainless steel eye bolt into the insert after sealing the threads with a few turns of PTFE tape. The Kiss now hangs perfectly level and safely on a rope from this eye bolt.

The stator was then carefully lined up with the holes for the four screws and pushed into the casing. The rotor then had to be re-inserted inside the stator - very carefully, and wearing industrial gloves. Due to the magnetism it was very hard to push the rotor into the windings, until it suddenly decided to let go and disappear into the winding, hopefully not with one of your fingers.

Balancing the three blades, using a balancing mandrel between two benches. Finally testing the output using an electric drill to spin the rotor.The front cover has a small dust and water seal in the front, that should be replaced before the cover is bolted back on the body. The old seal is easy to push out and a new one is pressed in. A bearing seating was also inserted in the front cover recess. I masked all around the joint with tape then caulked it with 3M 4000 and tightened the front cover to produce a watertight seal.

I forgot to number the position of the blades on the hub before they were removed, so it was necessary to re-balance them to ensure a vibration free rotation and minimal wind noise. If I had marked them beforehand this would have been unnecessary. Balancing is done using a mandrel through the 5/8" inch hole in the hub and supported between two level benches. In an unbalanced assembly the heaviest blade always rotates to the bottom, I then shaved off a little piece of the lead tape that is glued to the back of the blades for this purpose. This was repeated until the assembly rotates freely and stops in any position.

I tested the output by connecting the wires from the generator to a multimeter, then spinning the shaft with an electric drill. The output was up to 28 amps AC. I also made a stronger repair to the two plastic nose cone pieces by pop-riveting them with four tiny rivets.The rectifier changes the AC output of the kiss to DC, to charge the batteries.

I used a multimeter to test the six one-way diodes on the rectifier in the control box. These convert the AC output of the generator to DC for the batteries, and they were all reading correctly. I replaced the control box behind the main electrical distribution panel in the saloon and this completed the reassembly of the actual generator.

                                                 REINSTALLING IN A DIFFERENT PLACE.

While rebuilding the machine I decided to look into mounting it on a pole at the back of the boat. I didn't want a repeat of this last hurricane and have to rebuild the thing once more. If it was on a pole I could actually reach to unscrew the whole blade assembly and the body would just sit there facing into wind with no damage.

I had no pole or support struts, so I placed an add’ on a few of the forums I'm in. A response came from a man in Virginia who had a 10’ foot stainless steel chromed pole and supporting struts. I struck a deal, but then we found it would cost more than $100 to ship by a common carrier, because it was too long for both UPS and FedEx. I asked the seller if he could cut the pole in half, which he did and it arrived a few days later. It was 2½“ inches diameter, so now I had to think of a way to splice the two halves together to be strong enough to support a whizzing wind generator weighing 40 lbs.

A splice was made to fit inside the tube to join it together.I made a splicing piece by hacksawing 6” inches off one end then sawing down the length until I had a half inch slot in the piece. It was then a matter of just squeezing the splice together and wedging it 3” inches into the sawn end of the pip. Before doing this, I market the exact place where the cuts joined, that the seller had made. Next I drilled and pop riveted the splice to the tube with five 1/4” inch stainless rivets. Then I hammered the other end of the pole into the splice and riveted that. This produced a join that was hardly noticeable, and about as strong as the rest of the pole.

I was still missing a couple of steadying struts and a base. I bought these at my local marine shop and I was ready to mount the Kiss on top of the pole. This also proved to be a challenge because the diameter of the pole was bigger than the inside diameter of the Kiss. I solved this with a PVC reduction pipe fitting that slotted exactly into both items.

The kiss generator is supposed to just swivel on top of its support tube without any bearings, but with plain bearings it took a strong wind to swing the machine into the wind. I made this much easier with a roller bearing that is the same diameter as the inside of the kiss pole and it reduced the friction to zero. It now rotates at the slightest breath of wind.

Pushing a 9’6” inch pole upright with a 40 lb weight on the end was interesting, but as my wife held it steady I quickly fitted the support struts and made it secure. I did this without the blades being attached because we didn't actually need the thing to work, because we had marina dockside electricity to keep the everything running and still in the middle of the hurricane season so I didn't want any repeat of the previous performance.


Kiss - header
Back to navigtion
The Kiss wind generator is mounted on a pole on the stern.