I will be the first to admit that a professionally executed reverse-tuck eye splice on modern braided line adds an air of expertise and seamanship to any boat. When I see a boat equipped with braided eye splices and thimbles I am more impressed than any amount of brightwork or varnish, The finished art, and I use that term deliberately, is the thing everyone notices, but what nobody sees is how the actual splice is concocted, and I use that term deliberately as well! They also don't see you soaking your hands in hot water, to reduce the pain and swelling from pulling and pushing the rope strands through each other!
The first reverse-tuck eye splice I ever tried took all day and used up about ten feet of expensive good quality double braided rope, and even then I didn't want to show it to anybody. Since then I have managed to do a few that are more respectably looking, but I've always needed an instruction sheet to remind me which bit of rope is trimmed here and which bit goes there. To say it's a complicated procedure is an understatement similar to “some assembly needed,” on the box of a chandelier I recently put together, that nearly finished up in the garbage bin!
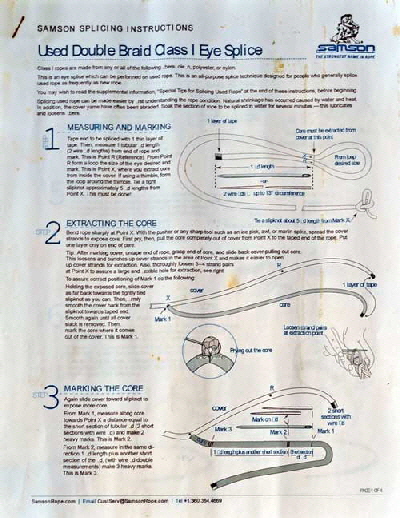
 The Samson Ropes company instruction sheet for a double braid class one eye splice encompasses ten very detailed drawings, and I never even knew there were classifications of eye splices. There are also videos on the web that show slight variations in methods, all looking frustratingly easy, but far a too difficult to follow.
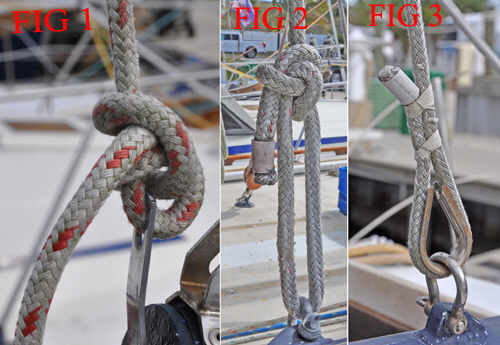
Unfortunately, there aren't many attractive alternatives when you need to bend a thimble on the end of a line. You can always tie a knot Fig1; do away with the thimble and make a loop with a bowline Fig 2 or just plain whip the lines Fig 3. These methods are all subject to chafe and do not distribute loads on the line very evenly, not to mention their appearance.
The truth is I absolutely hate doing reverse-tuck splices and so do all my sailing friends. Life is too short. So I decided to see if I could devise an easier method to effectively splice a rope round a thimble, and that can be understood by any simple sailor. The word effectively needed to encompass, strength, appearance and effort in that order.
After a lot of experimenting trying to thread different trimmed lines through the inside of the line using various fids, I decided to fall back on the age-old method, whipping and parceling, but with modern improvements.
METHODOLOGY.
The first thing to do before this splicing starts is to slide a suitable size of heat shrink tubing down the line. This needs to be long enough to cover the finished splice with an inch left over. Shrink tubing finishes off the splice and protects the whippings from weather and UV sunlight. It is best to use a marine grade tubing with an adhesive inside that melts upon shrinking and makes the cover waterproof. They are available in different colors and matching the color with the rope adds a professional touch. The line used here is 3/8” inch double braided and new. I only mention that because it can be almost impossible to do a reverse-tuck on old worn and dirty braided line, but with my method it doesn't make any difference whether the line is new or old.

 First tape the line round the thimble using regular 3/4” inch electrical tape, leaving enough tail to be able to wind three separate whipping points. As a rule-of-thumb, I make the tail ten times the diameter of the rope.
Now whip the lines together using waxed twine right up to the thimble. The whipping was done using the regular technique every sailor should know, nothing unfamiliar here.
To produce a tapered splice carefully pick one quarter of the strands out of the outer cover. This is easy to do with any sharp pointed instrument and the strands can be pulled backwards out of the cover and trimmed off level with the whipping.
Now do a second tight whipping around the slightly reduced line thickness then cut another quarter of the strands off.
Now do a third whipping around the rest of the line.
To add extra strength lock stitch sideways through
both lines at the throat in and out, then back again at 90 degrees.
The final operation is to sheath the splice with shrink tubing. Even Samson's instructions and others advocate that the spice should be sewn at the throat because it adds strength and minimizes expansion at the throat, where it is the first sign of failure.
Heat shrink tubing is best reduced using a heat gun but it can also be done with a hair dryer. The obvious thing to be careful of is not to damage the outer core of the rope. It should be shrunk until glue seeps out of the ends then left to harden. The completed assembly now looks very similar to a reverse-tuck splice and nobody can tell how it's made because they can't see the underlying work.
TESTING.
 The object is to achieve maximum strength in the splice, but whenever a rope is joined or run through a thimble or shackle it will be inherently weaker than the rest of the line. I wanted to test how much this was but I had no specific equipment to measure a load on a splice, so I decided to try to test one to destruction.
I spliced a thimble on some 3/8” inch line and purposely left the heat shrink off to be able to inspect it during the test.
I wound a few turns of a 3/4” inch diameter mooring rope round my fore-mast and passed it through the thimble then tied it off. The bitter end of the test rope was wound four times round the warping drum on my Maxwell windlass 12’ feet away. I watched the line draw tight as the winch took the strain and there was a bit of creaking from the securing rope as everything bedded down but otherwise no movement at the splice.
With further pressure from the winch the whipping began to stretch and I noticed the throat opening a little, By this time the rope was absolutely bar tight, as I would not expect under normal sailing conditions, yet the splice held. By this time the windlass was beginning to strain, but with a further touch on the button the splice exploded with a crack! leaving the thimble rocking gently on the securing rope and the line shredded. The whipping had let go and the line pulled through the thimble. Unfortunately, I had no instrument to measure the actual load on the line when the splice failed, but it was very very tight.
A few days later I make another splice, this time covering the rope with shrink tubing. On exactly the same test the relays in the Maxwell C10 windless began to ‘flutter’ and would not turn further, and the splice held. Clearly the shrink wrapping had given extra strength to the spice.
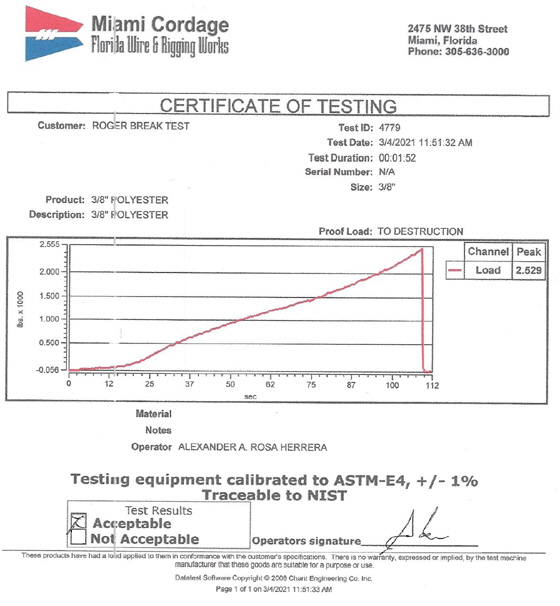
 l then contacted Miami Cordage Inc, a rope making company in Miami, who have a rope testing machine used to test ropes they make for the Navy and Coast Guard. Jason Hoffman, the CEO, kindly agreed to test one of my splices with his machine for accurate calibration. I made an eye splice on the end of the same rope I had tested and drove 350 miles to Miami. I watched as his machine stretched the line well past 2,000 lbs. where the rope was as stiff as a steel bar. Finally at 2555 lbs the splice split.
Samson's Trophy braid 3/8” inch line has tensile strength of 3,000 lbs, so I was more than pleased to find my splice held to about 80% of the line strength. I have now converted all previous splices to my new method on all my running rigging and used it on all braided lines, none of which have given way so far
 This is the test certificate issued by Miami Cordage for the testing of my splice.
A word of warning, No splice should be relied upon to attach personal safety equipment, like hoisting someone up a mast or attaching a lifeline. This precaution also applies to the conventional reverse-tuck splice or any other. An applicable knot is always preferable in all these cases.
