My old Caribe Hypalon RIB dinghy had recently started to slowly deflate, (again), so I used the age old soapy-water-spray method to test for leaks, and soon discovered that one of the chambers valve was leaking. It wasn't leaking round the perimeter where they normally leak, but when I squirted the inside of the valve lots of bubbles came out, indicating that the valve was not seating correctly to make an air tight seal. I tried to clean the inside with a cotton bud and some washing up liquid and that did reduce the bubbles a little, but not entirely. I also fitted a second sealing washer on the valve cap and squeezed it tight up to the valve face, but the boat still deflated over a few days. “You've got to replace the valve,” an expert told me that was not what I wanted to hear
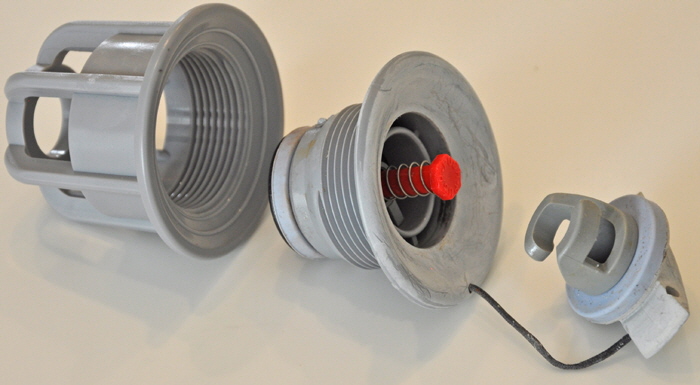
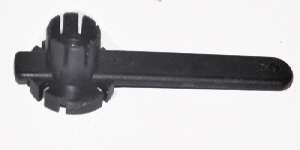 I bought a new Halkey-Roberts air valve from Amazon. The photo shows It consists of an inner casing and an outer valve that screw together clamping the boat material between them. I couldn't loosen the old valve by using the plastic valve tool that came with the valve because it did not have a long enough handle for me to put enough leverage on the valve. I made my own lever from a socket, to which I could fit a long wrench handle. The cut outs engage in the inside of the valve that is a normal
  right handed thread and best unscrewed with the tube fully inflated when it is more rigid. My tool easily unscrewed the valve and after fully deflating the boat I carefully held the inner casing through the thick dinghy material to stop it dropping into the chamber, as I completely unscrewed the valve. I had the new part ready to screw back in, but after repeated attempts it simply would not screw into the old body.
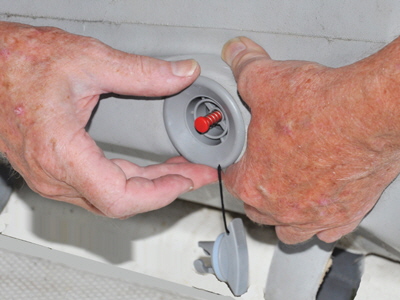 I struggled to hold the valve body with one hand while I examined the old and new valves. I immediately noticed that the threads on the new valve were much finer than the six threads on the old one I had just removed. So there was no way the new valve would thread into the old body. Ups! Nobody told me there were different types of Halkey-Roberts valves! With severe cramps now setting in my fingers I finally had to let go of the body, and it fall into the depths of the chamber.
The next thing I did was to telephone Halkey-Roberts in St Petersburg, Florida. “Oh yes we altered those valves over ten years ago,” I was told. To which I asked more in hope than expectation, “Can you still sell me one with the old threads?” “Fraid not,” came the reply, “You will have to somehow fit the new body inside and screw it into the same outer valve.” No further sympathy or advice was offered at all.
NOTICE. This means that anyone with an older boat fitted with Halkey-Roberts type air valves will have to remove an old damaged valve as I was forced to do, so I will now explain how I did it
It turned out that this is definitely easier said than done. The problem is; The hole in the chamber is only 1¾” inches in diameter and the valve rim is 2½” inches round. So there is no way the old body will come out, or the new piece go back in, because the hole is simply too small. After searching the web I was dismayed to learn that the only way to get the new valve casing inside the chamber was to slit a hole big enough to get a hand through, and hold the body in place while screwing the two halves together.
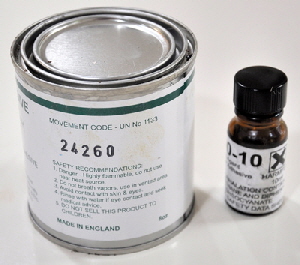
Obviously the slit would then need to be patched to make an air-tight seal. So after another computer session I found that Hypalon requires a special two part glue to bond a patch to the material. I bought a glue kit for $48.95 which is the most expensive glue I have ever bought in my life, plus another $38.95 for a 12” inch square piece of Hypalon patching material, plus $10.23 for the new valve, total $97.55. Quite an expensive patch methinks!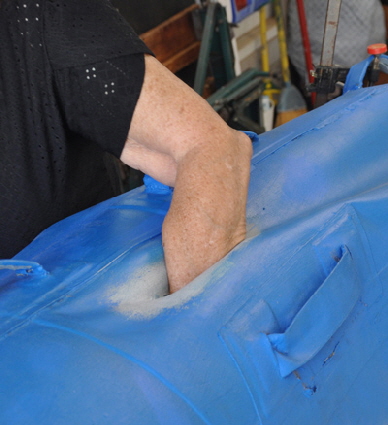 I started the operation by first donning rubber gloves and using acetone to remove the blue paint that I had painted the dinghy with years ago, and that was soon back down to the original grey material. Then, feeling like a surgeon about to perform the first incision on a very bloated patient, I used an Exacto knife with a new blade to slice a 6” inch long slit in the dinghy chamber. My wife, whose arms are thinner than mine, then cautiously reached in and fished the old valve body from the bottom of the chamber. Holding the new valve I then shoved my hand in and managed to offer it up to the valve hole and successfully screwed the two halves together. I then fastened them as tight I could using my wrench, thus trapping the hole between them to form an air tight seal – I hoped. I was told on no account to use any sealant between them, like glue or silicone, but just to screw them together dry, but tight.
All this was relatively painless, (after making the first incision that is), but now came the job of patching the slot to make it air-tight. The instructions with the glue were very precise, in six specific operations.
The first directive, in BIG BOLD LETTERS, warned that the humidity level should not be above 60% percent. Unfortunately, during that week in North Carolina where I live was having a heat wave. Some days were 95 degrees Fahrenheit with 80% percent humidity, I therefore waited until the temperature went down and the humidity with it, as 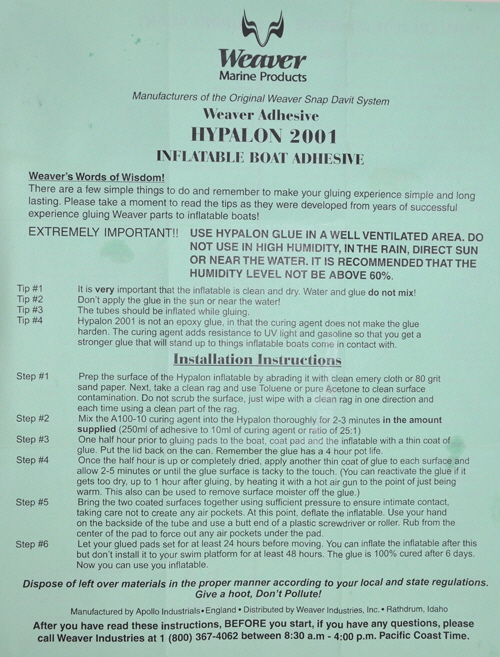 the dinghy waited, deflated and forlorn in my garage.
The cut was in the top of the chamber and there was nothing to support it underneath, so I carefully pressed two strips of duct tape under 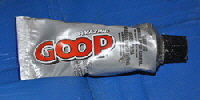 the joint to temporarily hold it together. I then smeared a thin layer of marine Goop glue along the seam and let it dry. This glue is ideal for use on flexible material like inflatable boats, because it stays quite flexible itself when dry and moves with the material. Even this crude seal allowed the chamber to be inflated slightly to give some support when working on the patch.
On the first cool low humidity day, I cut a patch out of the piece of Hypalon material, making it 1” inch larger all around the slit and with rounded edges at both ends.
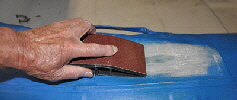 I prepared the surface of the chamber by roughing, (ablating) it with 80 grit sandpaper exactly as instructed. I then poured some of the adhesive into a glass container and added the curing agent. It is like water and getting a ratio of 25 parts adhesive to 1 part curing agent was pretty much guesswork, since I had no way to measure the glue. One thing the instructions don't mention is the type of container to mix the two parts in. DO NOT use a plastic or styrene cup, because the glue will dissolve it. I used an old glass jar that also enabled me to see how much glue was being poured.
 Applying the glue is a two part process. First a thin layer was applied to the joint and the patch, that I did using a ½” inch wide throwaway brush, then allowed both pieces to dry. Half an hour later a second coat was applied to both parts and after a few minutes when the glue became tacky, I glued the patch to the boat. I did this by carefully rolling the patch over the slit from one end to the other, and the partially inflated tube allowed me to use enough pressure on the roller to expel any air pockets. After an hour I could feel the excess glue beginning to set, so I inflated the chamber a little more, and to my surprise no air came out of the patch even then, or the new valve.
The next instruction was to let the patch cure for at least 24 hours. I left mine 48 hours, then inflated it to the recommended pressure of 3.0 psi. I also couldn't resist testing the new valve with soapy water, and to my intense relief it did not bubble at all, nor were there any bubbles around the patch. Yippee! The glue fully cures after six days, but I left my boat a week before hoisting it back on Britannia’s davits.
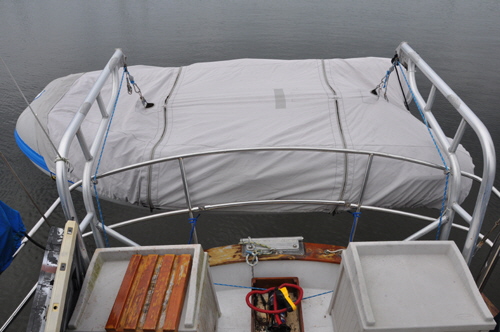 The boat has maintained pressure for a month, now but it does vary a bit due to changes is the weather. It softens a little at night when the air is cooler, then firms up during the warm days. Also, I don't leave it fully inflated in the summer heat, and it also has a cover.
This was another job I had never done before yet successfully managed myself. Not only is this gratifying and saves a lot of money by doing these types of jobs yourself, you also learn the intricate workings of your boat, which might someday be a life-saver at sea.
I was also pleased to read, right at the bottom of the instruction sheet that the glue was made in England, which is where I emigrated from forty years ago. Evidently some things do go full circle.
That did not go exactly as planned
