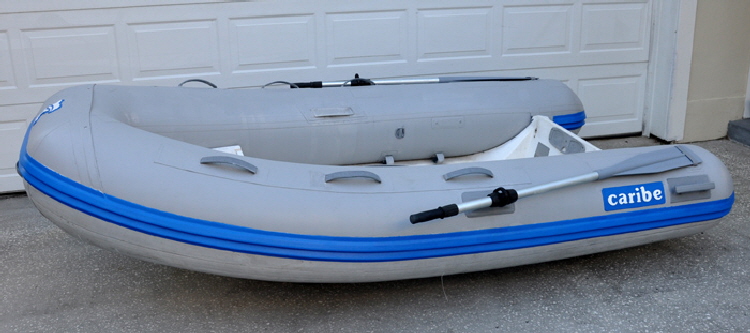
When I bought Britannia it didn't have a dinghy, but it did have very sturdy aluminum davits just waiting for a new “dink,” so I began to look into different specifications and costs.
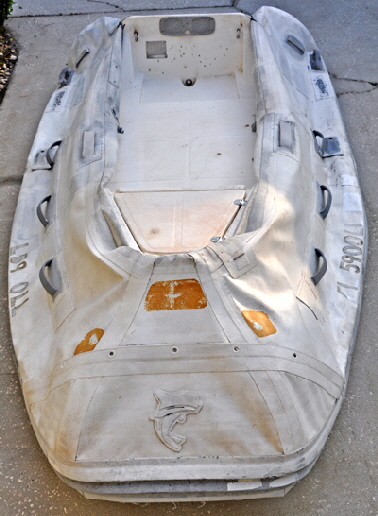 There are two main types: RIB’s, (rigid inflatable boats), and soft bottom boats. RIBS have solid hulls, that are great for stability and load carrying, but heavier than soft bottom boats of similar size. A 10’ foot RIB weighs around 130/150 lbs., whereas a soft bottom weighs only about 80/90 lbs. Another consideration is the material used for the tubes. There are basically two types: PVC and Hypalon. Hypalon is stronger and resists abrasion and UV light better than PVC. that is a thinner material with less abrasive resistance.
I favored a Hypalon RIB, but a new one was well outside my budget in the $3,000 to $4,000 range. So I decided to post an add’ on the Cruising Forum website, asking if anyone had a small used RIB for sale for around $500. I can't say I was optimistic, because even used RIBs usually sell for more than that. I was therefore pleasantly surprised to receive a reply from a member who had an old 10’ foot Caribe RIB in his back yard in Sarasota, Florida, that I could have for nothing if I picked it up. I drove the 120 miles the next day and shoved it into my mini van. It was a sixteen year old C10X model and decidedly dilapidated, but in situations like this you have to remember the old adage, “beggars can't be choosers.”
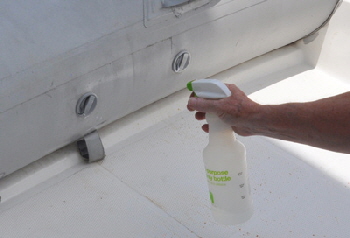 Upon repeated inflation only one of the three compartments held pressure, but the fiberglass bottom cleaned up well with soap and water, after I flushed out a few dead frogs and roaches.
For three days I tried to find the leaks, using an air mattress electric pump and the soap-and-water testing method. My pump could not inflate the chambers very hard but it did indicate that the valves were leaking. They are called Halkey-Roberts valves and commonly used on all makes of dinghies.
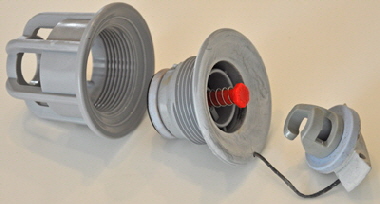 For those who have never dismantled one of these valves, the picture shows what they are like. It consists of a threaded holder that is inside the actual dinghy chamber and an outer valve that screws tightly into the holder. An airtight seal is formed by tightening the two together and trapping the dinghy material between them. There is also a cap that locks on top of the valve to keep water and debris out of the inside, but this does
  not contribute much to the airtightness of the valve. I could not unscrew the valve with the plastic removal tool I bought, because however I tried I could not exert enough leverage with the short handle. I made my own tool from a steel socket that allowed me to use a longer socket wrench handle. The cut outs engage in the inside of the valve that is a normal right hand thread and best unscrewed with the tube fully inflated when it is more rigid. My larger handled tool
  easily separated the two halves
 The inside part of the valve is not physically attached to the dinghy tube. So before the valve is unscrewed completely it is important to grip the inside piece through the boat material to stop it falling inside the tube. Once the outer valve was unscrewed I slid a screwdriver through the inner valve to stop it disappearing into the tube, or rather that was the plan. The inner valve holder cannot be pulled through the hole in the tube in any way whatsoever, because the hole is much too small, so the inner holder must have been installed when the dinghy was built.
Upon close inspection of the circular flange of the valve it was pretty obvious why it leaked. It was extremely dirty with bits of grit most of the way around the seal. The circumference of the hole in the Hypalon tube material was also dirty. It had probably never been dismantled for sixteen years, and I used Xylene liquid to remove all the ingrained dirt from the valve.
The circumference of the hole in the material was more difficult to clean. The screwdriver had to be held in place with one hand to stop it dropping back into the tube while I cleaned the material with the other hand, but of course the inevitable happened. The holder slipped and vanished inside the blackness of the tube. Using a flashlight I could see the holder, so I finished cleaning all the other parts, then used a long tool with a opening claw to hook the holder and bring it level with the hole. It certainly would make things easier if dinghy makers could glue the inner holder to the tube. However, I was told under no circumstances to be tempted to use any sealant on either of the flanges, they need to be screwed together dry. Once I managed to get them level screwing the two together was quite easy, and I wound the new valve right into the holder until it was finger tight. Then I fully inflated the chamber using a small powerful battery powered compressor I had bought, and tightened the two halves together as tightly I could with my homemade wrench.
 A soapy water test on the valve showed that I had solved the leak on the bow chamber, and apart from losing the inner valve it had all been fairly effortless. I therefore decided to dismantle the other two valves for inspection and cleaning. Indeed, they were both just as dirty, not only on the outer sealing ring, but also on the two internal rubber O rings. One is on the stem forming the actual valve air seal, and the other on the cap and both can easily be prized off with fingers and cleaned. On reassembly I even managed not to let the inner holder fall into the tube again. Neither valve leaked and should now be as efficient as the new one.
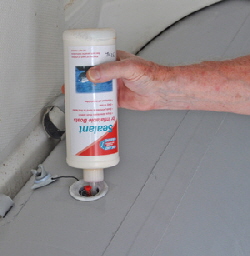
After inflating the boat with a compressor and testing for leaks all over I still found it had slow leaks, called bleeds, which were permeating through the actual material. I contacted Dan O’Connell, owner of Inland Marine, in Cape Coral, South Florida, who makes all sorts of stuff for repairing and restoring inflatable boats. Dan was extremely knowledgeable and helpful even to the point of advising me about some of his products that I did not need. He recommended I start with their internal sealant that is injected into the boat's chambers through the valves to seal leaks from the inside. I bought a bottle of Inflatable Boat Sealant.
 I could see where the bleeds were on the outside of the tubes, so I deflated the chambers one at a time and injected the liquid through the valve, then I half inflated the chamber and tilted it so the liquid would run down the inside to roughly where the leaks were. The sealant atomizes inside the tubes to where the air is escaping and coagulates in the leaks. The liquid then dries to a film on the inside of the chambers preventing the porosity problems.
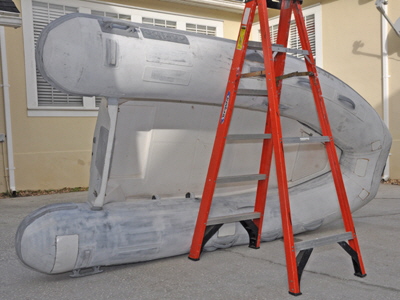
The instructions said to rotate the boat every 30 minutes to allow the fluid to coat the remainder of the inside. My wife and I found it very difficult to maneuver the cumbersome boat in the upright position, until I hit on the idea of using my step ladder to support it. We rotated it in this way 90 degrees at a time in the 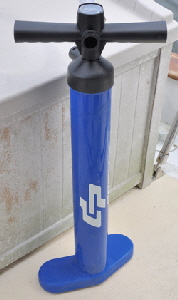 hope the liquid would coat the whole of the inside of each chamber, then left it overnight
The next day I inflated it as hard as my battery pump would allow, which was still not as hard as the manufacturer's pressure of 0.2 bar (2.9 psi), So I bought a more powerful hand pump to test if we had managed to stop the leaks. After leaving it in my garage for another night I inspected it in the early morning, while the air was still cool. To my pleasant surprise all three chambers were still hard. As days passed with no appreciable loss of pressure, I was confident the leaks were sealed.
The next job was to improve the scruffy appearance. I lightly sanded the whole topsides with 120 grit sandpaper to remove some of the loose paint that had been applied years ago. then I emailed a couple of pictures to Dan who suggested I should paint the boat with their special topside paint, available in seven colors. I ordered a quart of grey and a pint of blue
 I began by masking all around the rubbing strake, then gave it two coats of blue paint, using a cheap throwaway brush. I also outlined the “Caribe” logo on each side and the “Dolphin” logo on the bow . The next step was
  painting the whole of the topsides of the tubes grey. I masked off the rubbing strake, the oar-lock sockets, and
  all the handles. I decided to roll the paint over this large area using a 4” inch nylon roller. Two coats covered up most of the scratches and left a very presentable semi gloss finish. The boat now looked almost new.
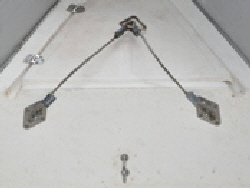
I then visited our local West Marine store where I used their wire rigging desk to made two stainless steel strops with U bolts to attach to the forward part of the boat. The transom already had two U bolts. A RIB is easy to mount lifting strops to the solid hull
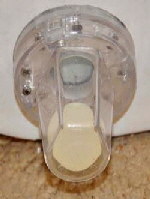 The transom drain plug was missing when I got the boat, so I fitted an automatic scupper drain from
  West Marine. The ball valve prevents water from entering when the boat is floating but drains when angled on davits. This saves having to remove the drain plug every time when the dinghy is on davits.
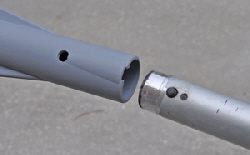
When I got the boat it didn't have any oar blades either, just the shafts. Caribe oars have blades that clip to the shafts with a spring loaded button, so I contacted Caribe Nautica, Doral, near Miami, Florida, and bought two blades. However, they wouldn't fit my shafts because there is a lip inside the blade that prevented it from engaging the button in the shaft. I had to file a small ridge all the way around the end of the shaft to make it slide further into the blade and engage the button. I didn't like the idea of a single spring button holding the blade anyway, so I also screwed a stainless self-tapping screw through the 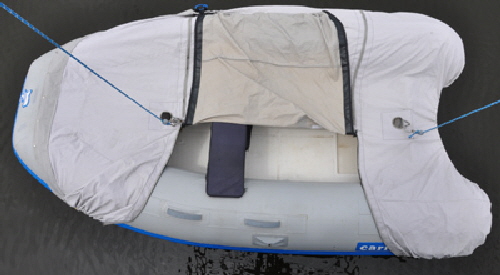 blade into the oar for extra safety.
I then bought a cover to protect the dinghy from the harsh Florida sunlight, but it proved very awkward to stretch over the front and rear tubes while the boat was in the water, prior to hooking it to the lifting strops. More than once I nearly fell in, leaning over to try and stretch the cover over the ends of the tubes. I finally made this much easier by stitching two zips in the cover forming a wide flap in the center, that I could kneel in to fit the cover, then zip it up when it was on the davits. A flap is also very useful to store things like fenders in the dingy when the cover is on.
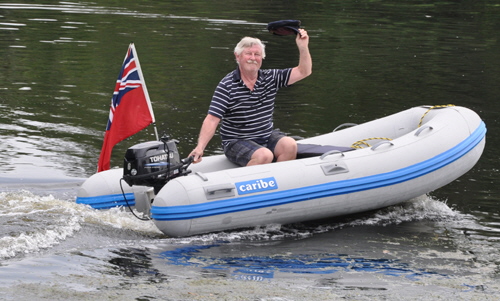 The extra weight of a RIB did not affect my electric hoist, that easily hoisted it out of the water in 20 seconds.
I had put a lot of elbow grease and cash into this project, not knowing exactly if it would be successful. But now I have a strong very presentable RIB that I am quit confident about using. We had a grand launching at the boat ramp near our marina but I forgot the champagne. But then, if I had smashed a bottle on the bow it would have probably punctured the dinghy, and I would have had to start all over again.
The total cost of the restore was $304.00, that I thought was a good deal, considering I now had a new dinghy.
