Britannia has eight golf-cart deep cycle lead-acid batteries, also called float batteries, in the house bank. They are mounted low down in the bilge, under the saloon floorboards, in two rows on either side of the 6.5 Kw diesel generator, a large water heater and the usual conglomeration of pipes, pumps and filters, not to mention the mainmast compression post. The boat also has two 12-volt batteries, one in the bow for the windlass, and the other aft as a dedicated engine and generator start. That's a total of 36 cells to check and fill with distilled water from time to time. The process usually took over an hour because the battery caps were not easy to reach deep down in the bilge. Yet batteries are the beating heart of all boats, sail or power, and should be one of the most accessible of items.
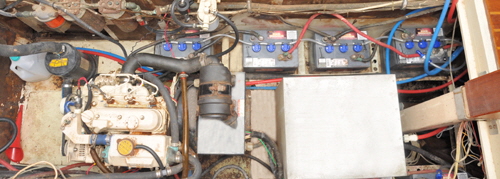 You would think a boat with a 14’ foot beam would have lots of space for batteries, but the large capacity water and diesel tanks on each side of the hull, (280 gallons of fuel and 325 gallons of water), reduces the middle space to only 36” inches wide. Just to be able to inspect the water level in the cells I had to first dismantle the saloon table and roll up the carpet, then lift up four large heavy plywood floorboards and sound insulation, then lay flat over the floor beams with a flashlight to unscrew the battery caps. To fill the cells l used a long narrow funnel that I stuck in each cell then poured water in from a bottle of distilled water. It was just guesswork how much went into each cell, and I know I sometimes over-filled them, but how else could they be topped-up, in such an awkward place?
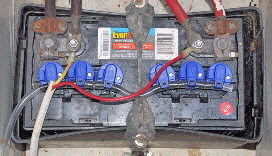
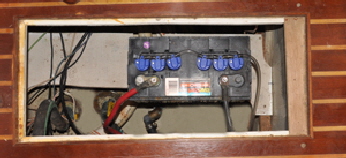 Britannia is not the only boat I have ever worked on with difficult to reach batteries. I was once the skipper of a 77’ foot ketch, with full standing headroom in the engine room. That voluminous boat had ten large 12-volt batteries sitting in a big custom made box, 60 cells in all. The problem was, even to just test the specific gravity and see if they needed water it was necessary to clamber over the front batteries to get to others at the back. I didn't do that very often.
It is of course best that heavy batteries be mounted as low as possible, and Britannia’s batteries weigh over 500 lbs. But batteries that are difficult to reach often receive less attention and maintenance, and it is ofter impractical to relocate them to give better access, due to cable lengths and the boxes they usually sit in.
 The water level in lead-acid batteries alters during charging and through evaporation, especially when batteries are in warm engine compartments. The battery charge is tested by drawing the electrolyte up into a hydrometer, then reading the specific gravity on the scale. If water is required this can be poured in through a funnel or special filling jug, but good access is always necessary.
I hated to even test my batteries, and what I really wanted was to change the whole lot for sealed AGM batteries, (Absorbent Glass Mat), that don't need any maintenance at all, but there was one slight impediment to that bright idea—$1600. If I wanted lithium batteries I would have needed to rob a bank!
I wondered if there was some sort of automated filling system, and indeed a search for "automatic battery filler systems," on the web brought up a multitude of different devices. A cheap simple method was a half-gallon bottle with a special valve on the spout that when inserted into a cell delivers water if needed, then shuts off at the correct level. There are several other inexpensive filling systems to be found under these search keywords, but I would still have to go through the same rigmarole of removing floorboards, etc., so they did not fit my needs. I continued to look for an automatic system that I might install permanently on the batteries themselves, and that would work without removing the floorboards.
THE SYSTEM.
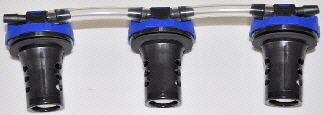
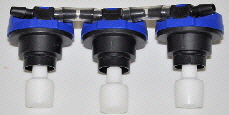 I found a company appropriately called Water My Battery, www.watermybattery.com with a water filling systems for golf carts, RVs and boats. Under the system selector on their website I found, "marine battery watering systems," bingo!
The principle is simple enough when you think about it. The battery caps are replaced with special valves interconnected with plastic piping. The valves open when the water level drops allowing new water to enter the cell, then they close when the required level is reached. The valves are all interconnected to a common feed pipe, leading to a tank of distilled water high enough above the batteries to give the required gravity pressure, and the system self-feeds. Unfortunately, in practice it's not quite as easy as that.
The website offers a lot of ways to find the best combination of valves and pipework, but I still had questions specific to Britannia.
- The distance from my battery bank to the forward windlass battery is 15’ feet. Would the system self-fill over that distance?
- Can a hydrometer still be used to test the specific gravity of each cell, without removing the valves?
- What is the height of the water level over the plates when the valves close? If a sailboat is heeling on the same tack for many hours or even days, would water run out of the caps?
- How do you know when the batteries need water?
I telephoned the company and spoke to the manager, Desiree Flores, who suggested that because I had so many batteries over such a long area they should be split into two separate feeds. I also learned that the header tank method of gravity feeding is not actually fully automatic. The tank has to be disconnected after use because constant pressure might cause an overflow of the valves. they had another method of filling with the use of a hand pump similar to those used to feed fuel to outboard motors from remote tanks.
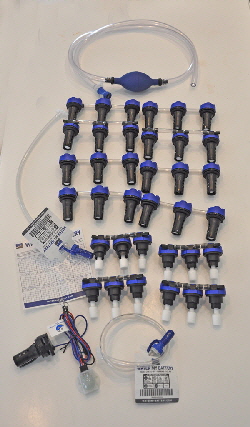 Unfortunately, testing the specific gravity of each cell with a hydrometer still requires the removal of the valves.
The valves set the water level at 1” inch below the filler cap level that is well above the plates on my batteries, so even if the boat remains heeled for some time it is unlikely the plates will be exposed.
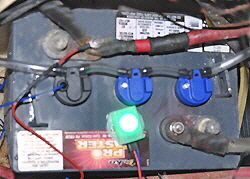 In answer to the fourth question. The company makes a special valve, connected to a neon light that blinks green when the level is satisfactory and changes to red when the battery needs filling. I also fitted a battery voltage meter on my power distribution panel showing the voltage of each battery bank that gives me a rough idea of the condition of the charge.
Valves are made to fit the caps of all types of batteries, and the warranty is five years.
I subsequently ordered 24 valves for my 6-volt golf-cart batteries, and 12 to fit the two 12-volt batteries, along with the hand pump.
INSTALLATION.
I planned to arrange my pipework into separate feeds on each bank of batteries. The port side run will also feed the 12-volt engine start battery and the starboard run will likewise feed the windlass battery.
The system must be installed when batteries are fully charged since this is when the electrolyte level is at its highest. Mine had been on charge for three weeks without use and were fully charged and full of water.
 The valves come pre-assembled in banks of three, with their tubing and they just snap into the batteries. All I had to do was inter-connect each set with the tubing supplied to form a string, I used a pipe cutter that produces a clean straight cut in the pipe with no burred edges. The tubing is then just pushed over the barbs to join it to the next bank of valves, and the end valve in the run is capped off with a plug. I routed my two fill tubes at the other end where I kept a gallon of distilled water and where I could easily get to them just lifting a small floorboard. All connections and pipes should obviously be free of kinks and tight bends.
METHOD OF OPERATION.
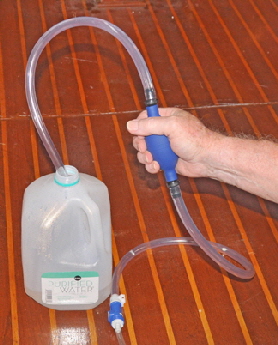 To fill the batteries I connected the fill tube to the end of one of the battery bank with the quick connect plug and the other end was placed in the water bottle. When the bulb was squeezed a few times it pumped water along the tubes and into the valves. I could see water passing through the pipes and as I continued to squeeze the bulb it became harder, indicating that all the cells had been filled and the valves had closed. The quick connect was then disconnected and the end of the pipe automatically capped off. It's that simple.
It took less than five minutes to fill both battery banks and I was kicking myself that I had spent the past ten years lifting floorboards and scrambling about in the bilge, servicing my batteries by hand. This system also fills the cells more accurately and evenly.
This is another really good idea to make life easier on a boat.
Costs: The valves are sold in kits and pricing for various battery configurations is on the company website. One kit for four of my golf-cart batteries was $107.00. The manual pump was $25.00 and the water level indicator $55.00. This is a very good way to keep batteries in tip-top condition with hardly any effort.
WITHOUT EVEN TOUCHING THEM
