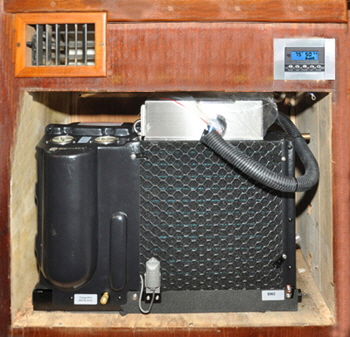
Britannia had neither air-conditioning nor heating when I bought her one cool December day in Fort Lauderdale Florida. In winter in The Sunshine State you can often manage without either heating or cooling, but come May and throughout the summer the oppressive heat and humidity can become unbearable inside a boat. I therefore knew I only had about three months to get an AC unit installed to at least cool the aft cabin bedroom, bathroom and saloon. I set about researching the many makes and prices of reverse-cycle, (heating and cooling), marine air conditioning units.

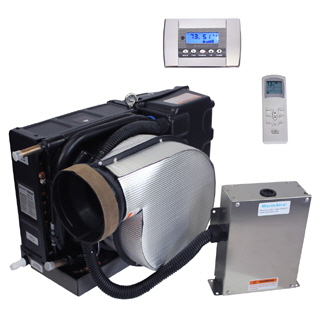
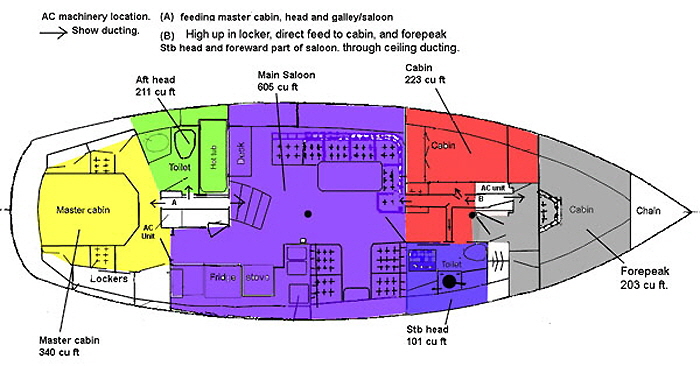
This is the kit from Marinaire showing the main items needed to install a marine AC system.I had never fitted AC in a boat before, so I had no experience of what size unit, or units, might be needed, or how to install them. It seemed to me the first operation should be to determine the cubic capacity of the various areas I wanted to treat. I took detailed measurements and calculated the cubic capacity of the aft cabin, aft bathroom and saloon, then made a drawing (above). I measured the remainder of the boats interior as well, because I was sure I would eventually need a second unit to cool the forward cabins. I then e-mailed the drawing to different manufacturers for their suggestions.

I received recommendations varying from a single large unit in the middle of the boat, to three separate smaller units. Most seemed to agree the overall cooling capability needed to be around 35,000 BTU (British Thermal Units) to be effective in the height of summer. Prices and  specifications varied wildly between manufacturers and shipping charges, that are also relevant because AC units are heavy, around 80 lbs for the main unit alone. For people like me, who didn't know much about boat air conditioning, a basic kit consists of:

The self contained air conditioning unit with its electrical box and control panel.
A 120-volt sea-water pump that pumps sea water through the unit.
Other items as needed depending on where the AC unit is installed, including water pipes, filters, ducting and vents.

It is better to have cool air discharge into cabins as high as possible because cold air falls. Ducting is therefore especially important because if distribution pipes are very long or twisty considerable efficiency can be lost. This was one reason I finally decided It would be better to fit two units instead of one large one, that would have been cheaper. A single centrally mounted unit would have needed very long tubes to blow the air forward and aft along my 45’ foot interior, and the flexible pipes would need insulating as they passed through lockers and storage spaces. Ducting is not so easy to do on small sailboats but it would be easier to have shorter lengths from two units.

The aft AC unit front panal allows for inspection of the guages through the cutout in the front cover.Another reason I decided to eventually have two separate units was if one broke-down, then there would still be cooling from the other. This is a very practical consideration when it is 100F degrees and 90% humidity outside, and where without cooling, a boats interior can rapidly become 115F or higher.

The aft section of Britannia to be cooled consists of the large aft cabin, the en-suite bathroom, the saloon and galley. I planned to use a three cubic foot space for an aft AC unit by moving a couple of drawers in the aft cabin. In the forward section I could install a unit in the bosun's locker. Now all I needed was the equipment.

There are several makers of marine air conditioning units in Florida, so I decided to visit two on a round trip to Miami from Orlando, where I lived. I made appointments with two manufacturers and set off at 6 am down the Florida Turnpike. I arrived promptly at one company in Stuart, only to find the salesman I was to see had gone out, presumably to a more important customer. I was able to look at an AC unit, but not get answers to the many questions I had. I was not impressed.

My second appointment was at 1pm at Marinaire Inc, in North West Miami, 230 miles south of Orlando. The reception there was very different and I was able to satisfy myself about size and quality of materials. I actually came away with one 16,000 BTU air conditioning unit and pump, that saved the shipping cost of the heavy equipment. I decided to install one unit at a time, beginning with the rear of the boat, that contained our bedroom and bathroom. If all went well I would then put a second unit in the front of the boat.

                                                                 INSTALLATION

This is the aft AC unit installed.I cleared a space for the aft unit by moving a couple of drawers in the bedroom and repositioning them under the bed. The condensate liquid that is a by-product of the cooling was connected to one of the cockpit drain pipes.

I knew the AC unit would fit into the space I had made, but I had to modify the direction of the sea water inlets and outlets. I didn't want to solder elbows to the 5/8” inch diameter pipes, so I bought compression elbows that just needed tightening up on the pipe. These offer a bit more flexibility when working in a tight space.

The 120 volt pump sends sea water through both AC's for cooling.I had to also install the powerful sea water pump, that took a bit of scrambling to mount the large 120-volt pump, then plumb it with a filter to a spare sea cock. I then connected the pump to the AC water inlet and  outlet to a sea cock above the waterline. I wired the pump to a spare breaker on my distribution board and into the AC unit control box. Sea water is piped through the air conditioner and discharges through the sea cock.

Once the electronics and plumbing were completed the installation became a woodworking project. I had decided to built my own ducting out of 1/2” inch plywood, running through the engine room at a high level just under the cockpit floor. This offered a much smoother flow than convoluted tubing and enabled me to direct the air in straight runs exactly where needed. I had to cut This is the main trunking from the forward AC unit.holes in the forward and aft engine room bulkheads Crossover trunking carries air conditioning to the forward toilet from the main trunkingand re-route some wires. The duct was 8” inches wide by 4” inches high with an outlet deflected off into the bathroom. A further advantage of plywood ducting was it didn't need insulating like thin walled flexible pipe that is normally used, nor did it take up valuable space passing through lockers and storage spaces.

The Marinaire unit has the ability to rotate the blower outlet in any direction. I was therefore able to angle the outlet to suit the ducting and join them together with flexible plastic sheet, held together with, appropriately duct tape.

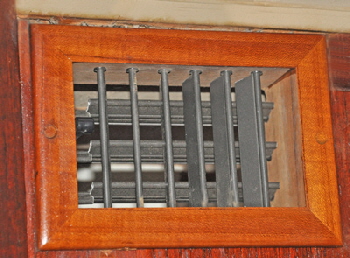
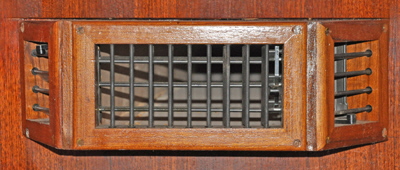
These large vents distribute air to the cabins.The combination vent distributes air throughout the saloon.For outlet vents I bought teak adjustable vents that can be closed off completely if required with a little lever in the vent and when varnished they look nicer than cheaper plastic vents. I used an 8” inch by 4” inch vent for the aft cabin outlet. For the saloon outlet I actually combined three vents to deflect air more evenly in different directions into the saloon. This enabled cool air to be deflected to the galley, that pleased my wife.
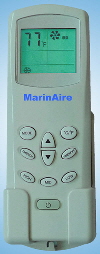
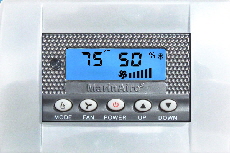
The digital control was easy to install since it was pre-wired to plug into the wall-mounted control panel. Marinaire also supply a 30’ foot extension cord with a thermostat attached. This enables the thermostat to be mounted in the best place within an area to achieve maximum cool air distribution. Other units had the thermostat attached to the control panel itself, that limits the reading. The unit also has built-in pressure gauges for high-and low gauge readings. This is useful for owner troubleshooting and there is only need for one low pressure filler connection if the unit ever needs to be re-filled with freon. The new type R410 is used in these machines.

The remote control enables adjustment of the AC unit when in bed.These are the built in gauges which enable moniterin gof the system.Marinaire supplies a wireless remote control in the kit, so the AC can be switched on or off, or the temperature altered remotely, that we have found handy when in bed. I could not find this feature on any other manufacturer's machines. It is also possible to buy a wi-fi control to operate the AC from an I-phone. It would be nice to be able to switch the AC on, either in cool or heat mode, say an hour before arriving at the boat. But this would mean leaving the AC sea cock open all the time, along with the shore electric connection, that I never did when we left the boat for any length of time.

It was marvelous to finally press the power button and feel the machine blow a blast of cool air into the cabin, bathroom and saloon. One thing that struck me was how quiet it was compared to others I have heard on boats. This is due to the compressor, that is the noisy part, being completely encapsulated and insulated.

The AC contrl panel. In summer, Florida temperature can rise to 95/105F with oppressive humidity. Britannia’s AC now keeps the inside of the boat at a nice dry 75F. Cool dry air (or very occasionally heat in winter), spreads evenly throughout the interior and no area is warmer or cooler than any other.
The total cost for one unit was around $2,000, including pipes, plywood, wire, and vents. This of course did not include my labor, but on a boat that's supposed to be fun!

Later I fitted a second unit in the forward section of the boat, blowing cool air into the fo’c’sle, port cabin and forward bathroom. I built straight through plywood ducting the same as the aft installation but with a crossover trunking into the bathroom on the port side. Air is also deflected into the saloon to assist the aft unit to cool this largest area. Both units work independently, except for the common seawater pump that feeds both, even if one is switched off. This provides great flexibility when there are just two of us on the boat and we sometimes switch the forward unit off or close the vents into the two forward cabins that has the benefit of blowing more cool air into the other areas.

The electrical draw from two units was too high for my single shore power cable, so I installed a second AC breaker panel. I needed this anyway to handle our electric kettle, toaster, microwave, and washer/dryer. I also had to modify the wiring from the 6.5 KW generator to feed both panels when running two air conditioners on generator power.

Even though we tend to now take our air conditioning for granted, it is still one of the best investments we have made to Britannia.


Air conditioning - header
Back to navigtion
This drawing shows all the separate areas to be air condiitioned by the two units.