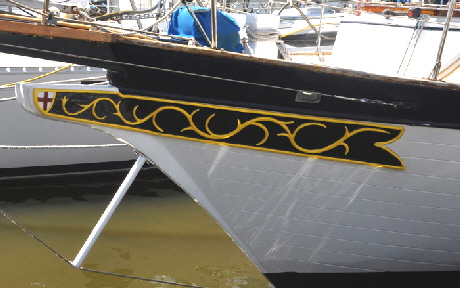
All The Down East range of boats had ornamental trailboards either side of the bow, except for the boat I bought.
 I decided to try making a pair myself. From photographs of other Down East 45’s I estimated they were about seven feet long and a foot wide at the rear, tapering forward to the beak head under the bowsprit.
 Wood was an obvious consideration material and I had routing bits and chisels to carve the intricate scroll work in a solid plank, but it was definitely beyond my expertise and equipment to bend a plank to the curve needed for the beak head. A hardwood plank of teak, the size I needed would also be very expensive. I considered building up a lamination of thin sheets glued together but I had no mold to preform them, except the actual boat. Since the boat was in the water that would have been a very messy job. I also felt that a couple of wooden boards either side of the bow would rapidly become just another high maintenance area.
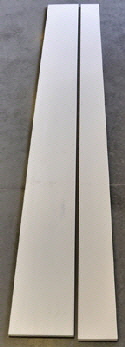
I continued to search the aisles of hardware stores and finally found some solid plastic Poly-Vinyl-Chloride, (PVC) boards, called trim-board made by Royal Mouldings Limited. (www.royalbuildingproducts.com). I expect the reason they were never suggested was because they were for use in houses, not boats. They are available in various widths and lengths, all 3/4” inch thick and in white pigmentation. These planks are actually easier to work then wood because there is no grain. The material is impervious to seawater and will not rot or delaminate like wood and also easy to paint. A major advantage for my project is that PVC can also be bent when heated. The boards are smooth on one side and have a wood grain on the other. I used the smooth side outwards for my trail boards.
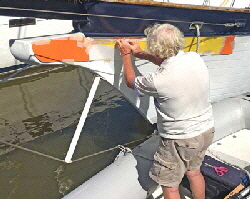 I bought some sheets of thin art board and a roll of masking tape to make a template of the shape I needed. When the template was removed and laid flat it was nothing like what I expected the shape to be, and it showed that I would need a board 14” inches wide and nearly eight feel long.
I then bought a 9” inch wide plank and one 6” inches wide, both 8’ feet long, to fabricate a single board. They were not exactly cheap at $59.00 for both, I glued and clamped the boards together edge to edge using regular PVC cement and primer, that is the same adhesive readers will be familiar with for gluing PVC pipes for lawn sprinkler systems, etc. I now had a flat board to draw my scrolls on and it took some time to draw a nice flowing snake-like pattern on the smooth side of the board. It was now time to make the first cut...
 There are two ways to carve a shape or name on a board, whether it be for a house or a boat. The shape can be cut into the board, (incised), usually in a V profile; or the surrounding background material can be removed, leaving the shape raised up (relief). I decided on the latter, even though it is the much more difficult and time consuming method, but I think the finished effect is more striking. For this I used my trusty hand held router fitted with a 3/4” inch wide flat plunge bit to remove the larger areas between the scrolls. I set the cutter depth to ½” inch, that would leave 1/4” inch of material in the base of the board. I also used a 1/4” inch plunge bit to remove material between the narrower areas.
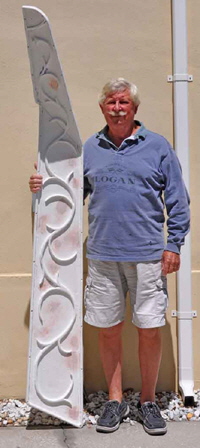
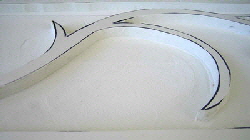 Before I started to use the router I taped a shop vacuum nozzle near the bit to suck up all the dust. Not only did this minimize the dust going all over me and my garage, but it allowed me to see where I was cutting. I first began routing out the larger sections between the scroll shapes, and also left a raised border all the way round the outer edges. It took a complete day to route out the background material, leaving the scroll as a raised relief. Then I changed the cutter for a 1/4” inch half round to form a rounded edge on all the square edges left by the plunge bits. Next came the hard work, hand sanding all the relief with 120 grit paper to prepare for painting.
 I then drilled a row of 3/16” inch holes at 12” inch centers all round the edges to take the stainless self tapping screws I would use to fasten the boards to the hull. I also pre-drilled for a few fasteners in the center of the board to stop it bowing. These were than counter bored with a 3/8” inch drill to sink the screw heads enough to be able to infill the holes. Removing more than half the thickness of the board made it much more flexible to bend to the shape of the hull, but I had yet to try to bend the rabbet..
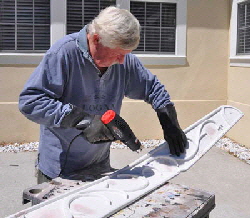
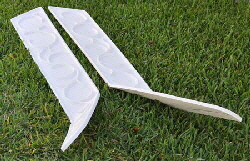
 I marked the board where the rabbet bend was and decided to try and pre bend the board to make it easier to fit. I had previously practiced on some off cuts to soften the plastic using a heat gun, so I had a rough idea how much heat was needed to make the board pliable. It was just a matter of keeping the gun moving over the area, wearing heavy gardening gloves and slowly the PVC softened enough to allow me to bend it. It certainly looked an odd shape.
Eventually the piece was ready for a trial fit to the bow, and I again used my dinghy as a work platform. This time my wife Kati joined me to hold the board in place while I fastened it. It was now pliable enough to conform to the gentle shape of the bow but I had not bent it enough to the sharper rabbet curve. I applied more heat and was able to push it into the curve and the exact shape of the beak head. I held it with clamps while securing it with screws. Suddenly I had quite a fancy looking trail board.
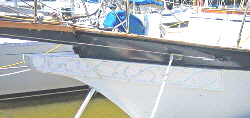 PVC is really amazing material, and when I removed the boards for painting they stayed in the exact shape of the hull and beak-head. I was so pleased with the result that I bought two more planks and fabricated the starboard board just like the port side, even before I had painted the first. Making the second board went much smoother, because by then my wife and I were experienced trail board fabricators weren't we??
PAINTING THE BOARDS
The next job was to paint the boards. I wanted the background color to be the same as the topside stripe, called Mauritius Blue from the Interlux Perfection range. These paints are two pot mixes and very hard finishes. I had used Perfection on the masts and spars years ago and they are as good now as they were then. However, since I was now painting PVC not aluminum I decided to seek advice from the manufacturers themselves. Matthew Anzardo, the Interlux marketing manager for North America was very helpful, and suggested I again use their Perfection and Brightside range of paints.
 Matthew first recommended cleaning the PVC surface with Fiberglass Surface Prep (YMA601V), then two coats of Epoxy Primekote undercoat, (404) also a two-part paint. Then I could apply the Perfection background and polyurethane scroll color.
All materials were from Interlux distributors, Jamestown Distributors. (www.Jamestowndistributors.com). Included with every tin was a mixing bowl, wooden stirrer, gloves and a filter. Shipping was also free.
Traditionally trail board scroll work was highlighted with gold leaf, but gilding with real gold leaf is a very specialized and expensive business, well outside my skill level. Unfortunately, Interlux don't have a metalized gold paint, so I decided to use Total Boat gold paint, from Jamestown Distributors, that contrasts markedly with the dark blue background.
I began by painting three coats of gold on the scrolls. I then applied the Mauritius Blue background while the boards were flat on the bench. That way, I didn't need to mask all round the scrolls because I was able to “float” the blue up to the edges in a neat line using a flat 1/2” inch wide artists brush. When it had all thoroughly dried I brushed on two coats of clear gloss varnish that further emphasized the gold, and the result is stunning.
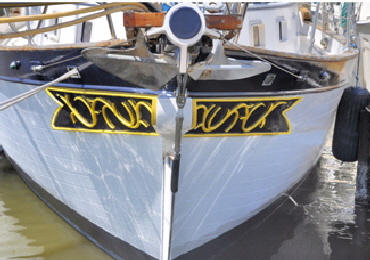
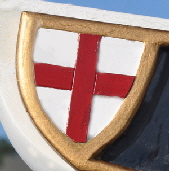 Since Britannia is a British registered boat I thought I would add some heraldic symbolism to my handiwork. The red cross at the tip of the beak head is the Cross of St. George, patron saint of England and what forms part of the Union flag. The boards looks so good, Kati suggested we should hang them in our house as a sort-of psychedelic artwork, instead of on the boat. It did seem a pity to subject all the hard work to the sea and weather.
Before attaching the boards permanently to the bow I gave the underside a liberal coat of 3M 5200 adhesive caulk, also from Jamestown Distributors. It took three tubes that helped glue the boards to the hull. I then trimmed the excess caulk and this long job was finished.
Finally I would say, don't start this job unless you have infinite patience. Making them was tedious in the extreme, first routing the pattern, then painting three coats on the scroll, then two on the background round the scroll. The result though is spectacular and well worth the cost and effort to me.
