One of the inescapable problems of owning a good old boat is it’s old!  If you are pushing 40 like Britannia, things need renovating or replacing. The overhead liner was one that had irritated my wife Kati and I since we bought her. It was vinyl material with a cloth felt backing stretched between the beams throughout the length of the boat. Originally, I'm sure it was a nice white color but over the years it had faded into a dirty beige.

the patched vinyl looked like band-aids.Changing her rig to a schooner didn't help because it meant bolting new fittings through the deck, things like eye bolts, winches, rope jammers, liferaft cradles and not least the new main mast, that came right through the center of the saloon. I had to cut the liner to install these and the only thing I could think of to patch them was cream colored masking tape that didn't match too well. The vinyl soon looked like a patchwork of band aids and I frequently saw visitors glancing upwards but politely saying nothing. Eventually ‘replace vinyl’ came to the top of my ‘to do’ list, but even thinking about it on a 45’ foot long ceiling gave me hot flushes. The saloon overhead alone was 9’ feet wide and 11’ feet long in five full width sections between wooden deck beams. There were also three cabins, two bathrooms and two corridors.

I found a suitable replacement material called plank paneling that is plastic (PVC) tongue and grooved planking used as wainscot panels on house walls. Each board is 7” inches wide and 1/4” inch thick and comes in packs of 8’ feet and 3’ feet long boards. It is also reversible with two different sides, one molded with two strips 3 1/2” inches wide and the other side with three thinner strips, so I decided to use the two strip side. An important benefit, particularly on a boat is the rot and mildew free lifetime guarantee and the ability to wash it with soap and water. I also thought the added thickness would give better thermal insulation that the vinyl from the hot deck.
                                                                             REMOVAL OF THE OLD OVERHEAD LINER

Removing he vinyl exposed all sorts of things, including dead cockroaches.The first job was to remove the vinyl from a section. It was secured every inch with rusty steel staples into a wooden bead that was in turn stapled to the overhead beams. Every foot of liner contained roughly 24 staples and on a 45 footer that means an awful lot of staples!

I cut the vinyl with a sharp box cutter along both sides and ends of the beams close to the staples, whereupon the lining frequently fell on my head. It contained nearly three decades of dust and more than a few dead cockroaches. It always Removing the old staples was slow going.HRamazes me that cockroaches don't seem to decompose over years… The remedy for this was to wear my wife's shower cap and for some inexplicable reason she insisted on buying a new one for when she showered.

After the material had been stripped out of a section now came the tedious job of removing all the old staples from the wooden bead, Luckily the bead was still in good condition and I used a thin blade flat head screwdriver to prize the staples up, one at a time then lever them out with long nosed pliers. Each section contained more than 500 staples. My new panels were self supporting between the 2’ foot wide beams so I planned to secret nail them to the beads with 1” inch stainless brads, (panel pins).

INSTALLING NEW PANELS

To cut the boards to length I installed my miter saw in the cockpit that sliced through them like butter. Unfortunately it only makes a 6” inch long cut so I had to turn the board over then very carefully finish the cut. A sliding compound saw would have been better to cut straight through a 7” inch wide panel, but on boats you learn to use the tools you have. The laser guide on the saw proved invaluable firing an accurate red line down the cut. The work started in the center panels and worked outwards right and left.The material can also be cut with a box cutter but that is a slow process and hard on the hands.

I first cut a piece off an 8’ foot board slightly longer than the space between the beams, then held it up between the beams exactly down the center line of the boat, that I had marked with a thin string fastened from one end of the saloon to the other. I found the boats beams to be remarkable parallel but each panel still had to be checked and sometimes trimmed for a close butt fit to the beam. I marked the other end of the panel using a wooden ruler against the beam then scored a line with a pencil. Then I climbed up the six steps into the cockpit, carefully cut to the line, then back down to try the fit, then back up to make minute adjustments, sometimes less than a millimeter to seat the panel snugly between the beams.

Nailing the panels in place.The next step was to drill pilot holes with a 1/16” inch drill into the corner tongues of the panel to stop them splitting then nailing the panel with brads at an angle into the wooden bead. I had to hold the small brads with long nosed pliers then finish them off with a nail punch. I did consider also gluing the panels but then they would have been practically impossible to remove if I ever needed to bolt another fitting through the deck.

Subsequent panels were measured and cut exactly the same way then tapped into the grooves of the adjacent panel covering the brads, then secured with brads on the other side. This way I slowly filled a ceiling section with new panels. It was all simple enough and I soon got into the swing of measuring and cutting, but I would be lying if I said I didn't make a few wrong cuts, and even found myself trying to mount a panel upside down more than once.

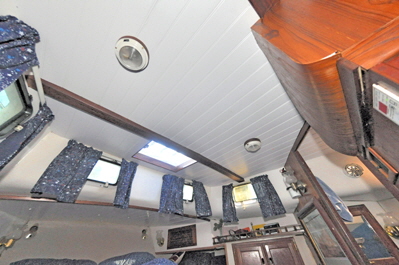
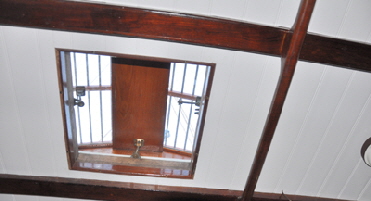
This is the aft cabin ceiling.When I came to the two ends of a section where the panels met the irregular saloon sides I had to make accurate cardboard templates with tapers and rounded sides, the edges of which also needed chamfering. The central corridor section also had to have a template. Overhead Lights were removed with the cloth then re-installed into the new panels that also helped to hold the panels in place. There is a butterfly hatch in the center of the saloon and the sides had to be extended before I could infill that section. The saloon took a week of full time work to complete and another three weeks to work through the whole boat. It was the butterfly hatch had to be extended and worked all round.gratifying to eventually see a complete new clean section of panels between the beams.

The longer panels in the bathrooms and bedrooms had to be supported to stop them sagging. I did this by screwing up into the under deck and covering the screw with a small collar and white plastic snap on cap. The section under the aft cabin was particularly tricky because I had to lie on my back to measure, then go upstairs to cut, then back down to nail a panel in place. It was tedious work, continually reaching upwards and my arms ached for days afterwards.

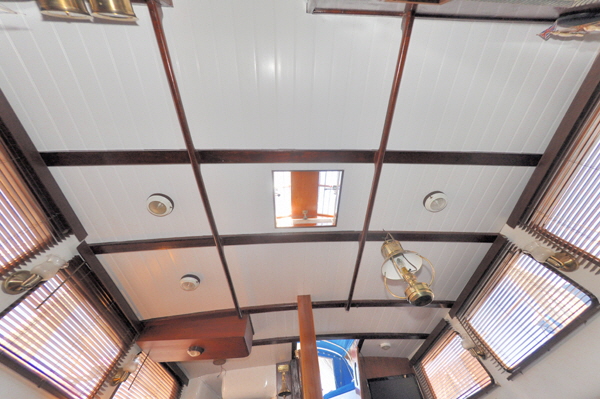
Eventually it was done and I had used ten packs of boards and cut about 200 panels. I removed more than 4000 rusty staples and pre-drilled and nailed some 400 brads. But  now Britannia has very professional looking overhead panels throughout the whole boat and it was worth it to have such a clean ceiling. We have also noticed a reduction in the heat felt through the deck on blistering hot Florida days. The effort has greatly improved the inside appearance and probably the value of the boat.

The cost of material was around $250.00, but I shudder to think how much it would have cost to have had it all professionally installed.

Finally, and just as a matter of general interest I have referred to the ceilings on the boat as both ceilings and overheads just for simplicity because they are actually both in modern vernacular. However, the correct nautical term is overhead. Ceilings on a boat are a very old term for the side panels that are often fitted in fo'c's'le’s.


Headliners - header
Back to navigtion
This is the finished hoverhead in the saloon.