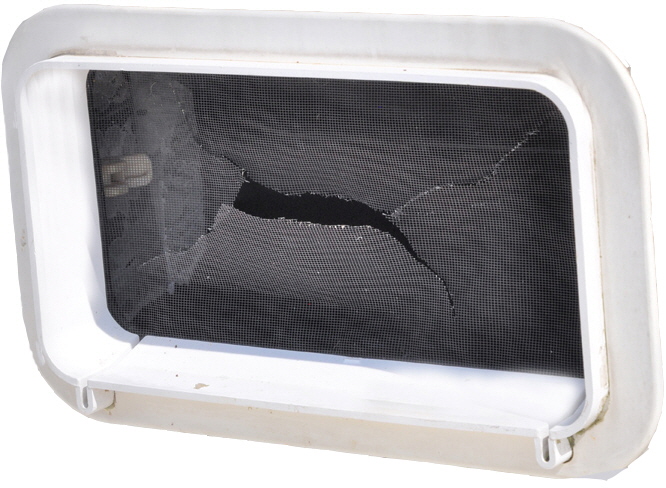
 My parents used this rhyme to tuck me up in bed each night, then I sang it with my own children. It is particularly relevant on a small boat, especially one that you sleep on because there's nothing more annoying than a mosquito buzzing around in a dark cabin, and the moment you switch a light on in the hope of whacking it, it vanishes into some small cranny—until you switch the light off again. It's also not really ideal to spray a small cabin with insect repellent either, because you might be the one who gets repelled. The answer is to have bug screens covering all opening apertures, particularly portlights and hatches that you might want open all night for ventilation.
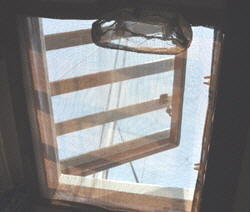
Most portlight manufacturers make mesh screens that fit their portholes and on Britannia we also have custom made hatch screens that clip in place under the hatches. We also have one which fits completely around the main companionway doors, but it makes it awkward to get in and outm so we don't use that very often.
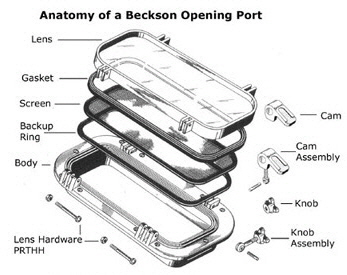
Portlight screens need to be outboard of the hinged window glass within the frame of the port, so when the window is opened inwards they remain in place. As a consequence they are subject to rain, sea spray and UV sunlight, even when the port is closed, so the thin mesh screens slowly deteriorate. Nearly all of the twelve opening port screens on Britannia had arrived at this stage, with some actually torn and needing replacing. My portlights were made by Beckson of Connecticut, with the newer type latching cams to lock the port.
The fine mesh screen is on an oval frame that fits into a groove in the gasket, and Beckson sells replacements for $33.00.But with twelve to restore, I decided to look into repairing them myself. I bought an 8’ foot x 4’ foot roll of fine mesh bug screen from my local hardware store the type used for swimming pool enclosures. along with some contact glue and a 1/4” inch art brush.
To be able to remove the screen frame it was necessary to pull the sealing gasket completely out of its groove in the body of the port, and it all needed cleaning in soapy water anyway. While I repaired the screens, my wife cleaned the hinged windows and we soon had ports looking like new.
 NOTE: It might be better to undertake this project on a day when no rain is forecast, because once the sealing gasket is removed from the body the window is no longer waterproof, even if closed.
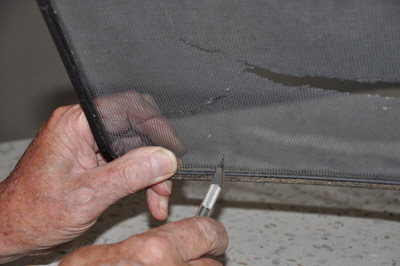
Using an Exacto craft knife with a new very sharp blade it was a simple matter to trim the old mesh out from around the frame. Then I brushed a thin bead of contact glue all around the rim of the frame and placed it glue side down on top of my mesh and pressed them firmly together. NOTE: It would be a good idea to first place a sheet of grease proof paper under the mesh, so the excess glue does not stick to the kitchen table - which is where you will be doing this delicate work, right? If some glue does get on the kitchen table it can easily be removed using Xylene solvent remover, and you can also clean the brush with it.
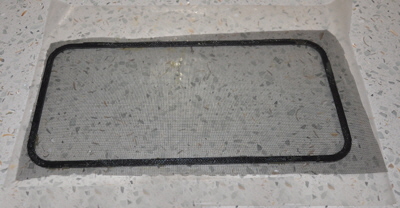 After a few minutes I cut loosely around the outside of the frame with scissors and placed it to one side, then moved on to the next screen. Replacing all twelve screens in this way took me just one hour. I then left them all overnight so the glue could thoroughly dry. It was then a simple matter to trim the outside mesh flush with the frame and I had nice new screens for all my ports.
A squirt of washing up liquid helped to ease the new screens into the grooves in the caskets and to press the gaskets back into the groove in the portlight. I could tell if the gasket was back in place properly, because the window closed evenly, like before.
 We now know that no bugs can come in through the open ports and if we also fit the hatch screens and keep the cabin door shut it is a fair bet the cabin will be completely free of any nasty flying bugs. Ahh! Sweet dreams.
New screens cost $32.90 each from Beckson, plus shipping and tax; that would be a total of about $450 for twelve ports. My screen material cost only $10. A quart tin of contact glue was $7 and the art brush $2. Total $19. Savings $432. A no-brainer as far as I was concerned.
